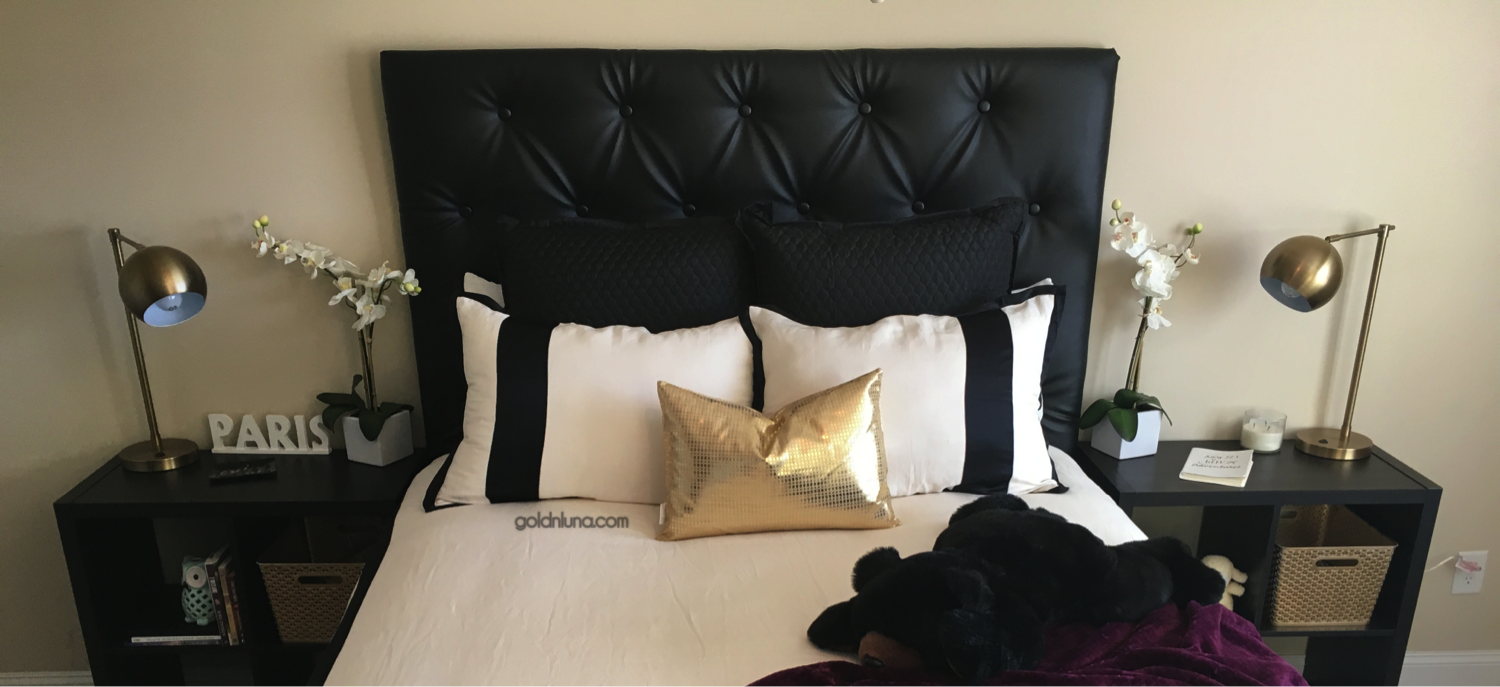
I decided I wanted to redecorate my room and I knew I wanted a black and cream color palette. Deciding this created a small issue… all of my bedroom furniture was dark brown. My headboard and footboard, my dresser, and my mirror were all brown. This would not fly in my book so I knew I would be starting from scratch. I moved all of my furniture into my spare room so I could start to visualize what I wanted. I decided to start with my bed first. I began searching for the perfect bedroom set but found nothing that fit the image in my head. I fell in love with the tufted headboard look but fell in hate with the prices. Some ranged from $400 to over $1,000 and I just did not want to cough up that kind of money. Especially knowing that I would probably change my mind on the style of my room within two years or so. The only solution for me? I would make my own black vegan leather tufted headboard. Here is how I did it.
What you will need:
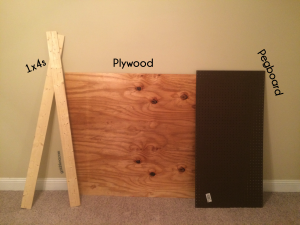
- 1 Sheet of plywood (I measured the width of my bed and added four inches. You can get your plywood cut to the size you need at Lowe’s)
- 1 Piece of Pegboard (optional)
- 2 1x4x8 Boards
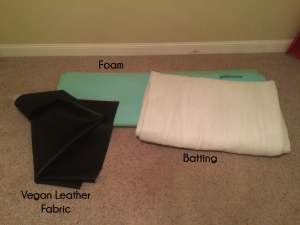
- 2-3 inch foam (I had to get two pieces)
- Batting
- Fabric for headboard and covered buttons (similar to what I used here and here)
- Button kits
- Plastic buttons
- Upholstery needle
- Wax Thread
- Marker
- Scissors
- Drill
- Drill bit (I used this size)
- Wood screws (I used these)
- Staple gun with staples
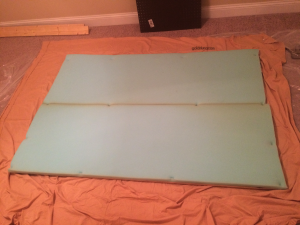
I initially bought a piece of pegboard to use as the back of my headboard but later decided I wanted something a little more solid. I started out with my piece of plywood on the floor. I needed to decide how many and where I wanted my buttons to go. Math is not my strong suit and I did not want to even try to figure out exactly how much space I needed between each tuft, so I took the easy way out. I laid my pegboard on top of my wood as a guide and simply counted the holes and used my marker to color in the hole noting that I would place a button there. This was visually and mentally easier to me than measuring with a tape measure. An added plus was knowing my buttons would be evenly spaced and straight. I removed the pegboard and grabbed my drill. I used a drill bit and drilled a hole through every colored dot. These are the holes that you will use to attach your buttons for the tufts. Next, I laid my two pieces of foam on top of my wood. I stapled the two pieces together in the middle, and then placed a few staples around the edges of the foam to adhere it to the wood.
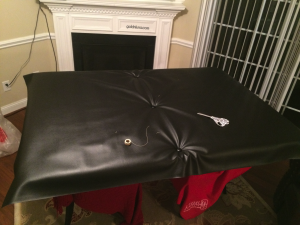
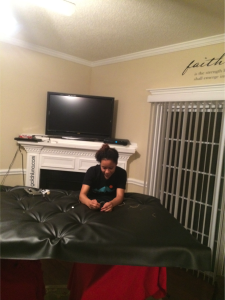
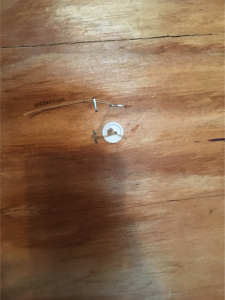
I folded the batting in half to make it thicker and laid it on the floor. I picked up the plywood and laid it on top of the batting, foam side down. I pulled the batting taut and stapled it to the back of the wood, on all edges. Now to add the fabric. I decided I wanted to use black vegan leather upholstering fabric. This material was thick and of great quality. It also came in the perfect width so I was able to just use one long piece. I placed the headboard on top of two chairs, foam and batting side up, so that I could easily work from the top and underneath the headboard. I laid the fabric on top of the batting, making sure it was evenly covering all sides. I prepared my upholstering needle by cutting a piece of wax thread about 24 inches long, threading the needle and tying a knot at the end. I took a plastic button and placed it over the drilled hole. I then took my threaded needle and started from underneath the board. I pushed the needle up through one of the button holes and drilled hole, through the foam and batting, and through the leather. Once the needle was through the leather I threaded a covered button on to the needle and then sent the needle back the way I just came, ending with the needle coming out of a different hole in the plastic button. I used the plastic buttons as security so that the thread would not easily slip through the drilled hole.
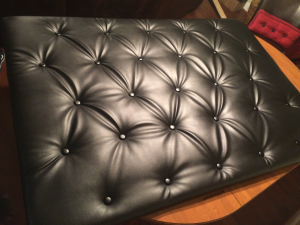
This part was not fun at all. It can be difficult pushing the needle back through the fabric and foam. I luckily had a thimble to place on one of my fingers that helped. I did this about 4-5 times, and each time the needle would come out underneath the board I would pull it firmly so that the covered button would sink in more (be careful not to pull too hard so that you do not break the wax thread). This creates the tufted look. After I was satisfied with the covered button indentation I pulled the thread and stapled it underneath the board in a zig zag. I tied a knot after the last staple and cut off the remaining thread. I started in the very middle of my board, doing the buttons right above and below the middle button, and then proceeded to do the remaining buttons making sure all of the tufts are even in depth/definition.
After finishing all of the tufts I flipped the board over onto a flat surface. I stapled the remaining fabric to the back of the board, pulling taut before each staple. I stapled all of the sides, then went back and stapled the corners making sure they all looked the same.
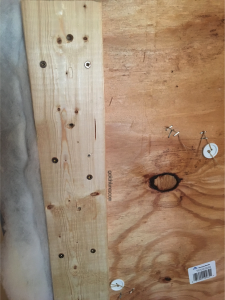
Now to add the legs. I had my 1x4s cut to the length I wanted at Lowe’s. With the leftover fabric from my buttons I wrapped each leg and stapled it on the backside. I did this just in case the legs could be seen so I wouldn’t be looking at plain wood. I placed a leg (staple side up) on each side of the board, made sure they were even, and then attached them with wood nails (about 10 per leg). Once I was satisfied with the sturdiness, I placed the finished headboard against my bedroom wall in the spot I wanted it. I then pushed my bedframe against the wooden legs and voila! My own custom vegan leather tufted headboard. I later decided the headboard was too tall for my liking so I simply sawed off about five inches from each leg. This vegan leather tufted headboard only cost me $98 (if you have to buy a drill and/or staple gun it may cost you a little more. Compared to the pricey tufted headboards I was originally looking at, I think got a pretty awesome deal.
For the covered buttons:
When you buy a button kit there will be easy directions and a cutting guide included. Be sure to use the button backs that have a loop so that you can thread through it. When I began making my covered buttons I quickly realized the leather material I was using for my headboard was too thick for the button kit. I went to the fabric store and bought about 6 inches of leather outerwear fabric. It had the same look as my original material but it was a lot thinner. I was then able to easily make my covered buttons, although my thumbs were super sore once I finished. You will need one covered button for each hole you drill on your board.
*Make sure the wood nails are only long enough to go all the way through the 1x4s and halfway through the plywood. I don’t think it would be a very nice experience having a nail poking through your foam and fabric!
**Before you buy any materials from fabric stores such as Hancock Fabrics or Joann’s make sure you look for coupons. They always have some type of coupon or promotion. I never buy anything from these stores at full price which definitely helped in keeping the cost of this project low.
